Post by azcrafty on Oct 12, 2022 15:52:01 GMT
Good morning!
I hope you had a good nite sleep and ready for another fun fold card.
This time a took step-by-step pictures and I will link the video too at the end if you want to see her process.
Again I changed the measurements on my card to have less scraps and to fit in a A7 envelop better.
1.Start with a 12x12 patterned paper , 6x5 plastic sheet ( you can use packaging) and a big element from your paper pads....I rarely use those on my cards because they are just to big. This is a cool way to use them now.
 20221012_072249 by Azcrafty, on Flickr
2. Cut the 12x12 paper to get 2 pieces of 6x11 and 2 pieces of 6x1 .
 20221012_072521 by Azcrafty, on Flickr
3. Score both 6x11 pieces at 1-2-4-6 inches.
 20221012_072615 by Azcrafty, on Flickr
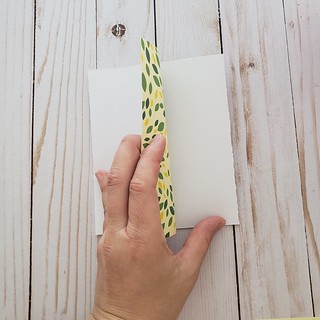
4. Accordion fold them to look like on the picture.
 20221012_072920 by Azcrafty, on Flickr
5. Glue them together. I find it easier if you flip it over and put glue on half side than turn it back and finish gluing the other half.
 20221012_073310 by Azcrafty, on Flickr
 20221012_073143 by Azcrafty, on Flickr
 20221012_073219 by Azcrafty, on Flickr
6. Glue the plastic sheet to the front ....start with one side and than the other.
 20221012_074207 by Azcrafty, on Flickr
7. Glue the 6x1 pieces at the edges to cover the plastic sheet.
 20221012_074341 by Azcrafty, on Flickr
8. Fussy cut your design and glue it on the plastic sheet. And viola! You are done!
 20221012_074705 by Azcrafty, on Flickr
 20221012_074709 by Azcrafty, on Flickr
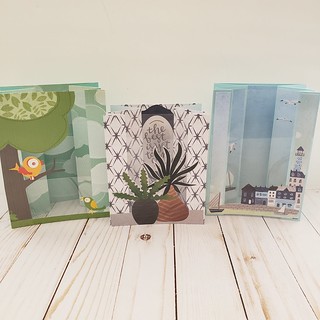
Here are some of the cards I made . Two is the 5x7 size and one is the 5x6 .
 20221012_074845 by Azcrafty, on Flickr
This is the
and blog post
mixedupcraft.com/2022/08/28/beautiful-double-vertical-stepper-cards/
Happy crafting!
Tagging grammadee .
ETA: forgot the twist.
The twist is to use one of those big element papers from a paper pad
I hope you had a good nite sleep and ready for another fun fold card.
This time a took step-by-step pictures and I will link the video too at the end if you want to see her process.
Again I changed the measurements on my card to have less scraps and to fit in a A7 envelop better.
1.Start with a 12x12 patterned paper , 6x5 plastic sheet ( you can use packaging) and a big element from your paper pads....I rarely use those on my cards because they are just to big. This is a cool way to use them now.
 20221012_072249 by Azcrafty, on Flickr
2. Cut the 12x12 paper to get 2 pieces of 6x11 and 2 pieces of 6x1 .
 20221012_072521 by Azcrafty, on Flickr
3. Score both 6x11 pieces at 1-2-4-6 inches.
 20221012_072615 by Azcrafty, on Flickr
4. Accordion fold them to look like on the picture.
 20221012_072920 by Azcrafty, on Flickr
5. Glue them together. I find it easier if you flip it over and put glue on half side than turn it back and finish gluing the other half.
 20221012_073310 by Azcrafty, on Flickr
 20221012_073143 by Azcrafty, on Flickr
 20221012_073219 by Azcrafty, on Flickr
6. Glue the plastic sheet to the front ....start with one side and than the other.
 20221012_074207 by Azcrafty, on Flickr
7. Glue the 6x1 pieces at the edges to cover the plastic sheet.
 20221012_074341 by Azcrafty, on Flickr
8. Fussy cut your design and glue it on the plastic sheet. And viola! You are done!
 20221012_074705 by Azcrafty, on Flickr
 20221012_074709 by Azcrafty, on Flickr
Here are some of the cards I made . Two is the 5x7 size and one is the 5x6 .
 20221012_074845 by Azcrafty, on Flickr
This is the
https://youtu.be/YGBmibCKn1o I got the inspiration from and blog post
mixedupcraft.com/2022/08/28/beautiful-double-vertical-stepper-cards/
Happy crafting!
Tagging grammadee .
ETA: forgot the twist.
The twist is to use one of those big element papers from a paper pad


