How to Get Your Money’s Worth from Every Stamp Set You Buy
Jan 14, 2023 23:10:10 GMT
MDscrapaholic, marie, and 23 more like this
Post by amysolovay on Jan 14, 2023 23:10:10 GMT
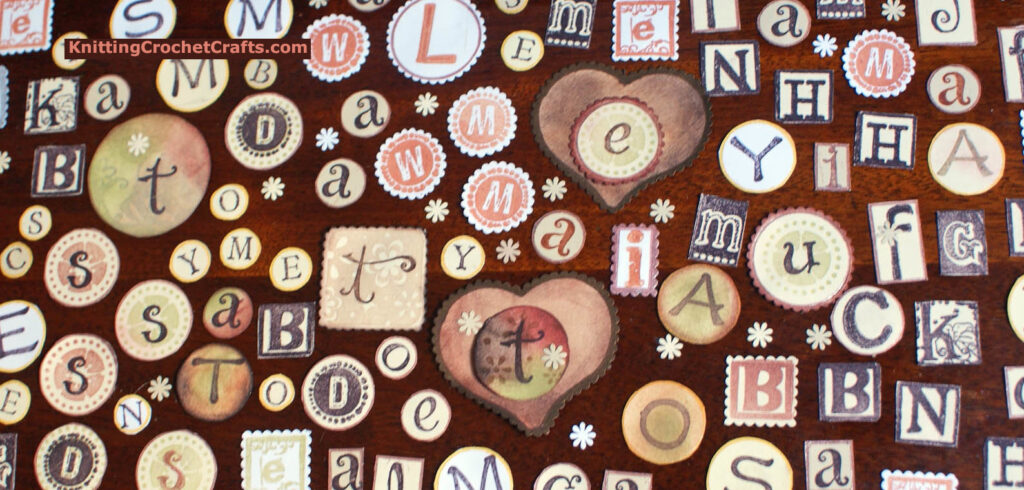
In another thread (here), a side note that came up for discussion is how a lot of people fall into the trap of buying stamps but never using them. I offered to share my system for actually using your stamps. Several people were interested in having that information – so here it is. I hope it will be helpful to all of you.
The backstory: I used to sell my own hand-stamped, hand-painted mixed media artwork from 2005 – 2010. My artwork was time consuming. I quickly realized that there was no way I would be able to sell art profitably if I didn’t figure out how to streamline my process and do things efficiently. So I originally developed this system to trim all the wasted time out of my art-making process.
I don’t sell my art any more. However, all these years later, the same system still works for maximizing efficiency when making scrapbooking layouts. So I am still using it.
There are 3 main keys to success with this system:
#1: Think of stamping and scrapbooking as two separate activities, and do them separately. (The same goes for other mixed media-type activities: stenciling, ink blending, spraying with sprays, painting, collaging, etc – do each of these types of activities separately in batches.)
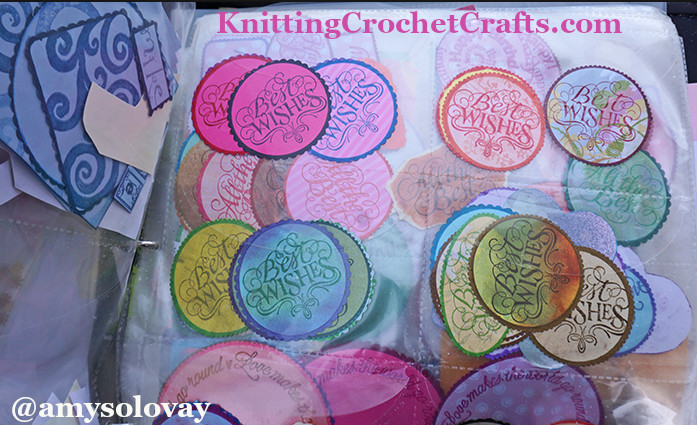
#2: Set yourself up with a viable organization system, and use it habitually. Specifically, you need a system for organizing your stamped images along with your other supplies. The stamped images need to be readily available to you when you’re ready to use them. So if you usually organize by manufacturer / collection, put your stamped images in with your other papers and supplies from that collection; if you organize by color, put your stamped images in with other supplies in the same colors –etc.
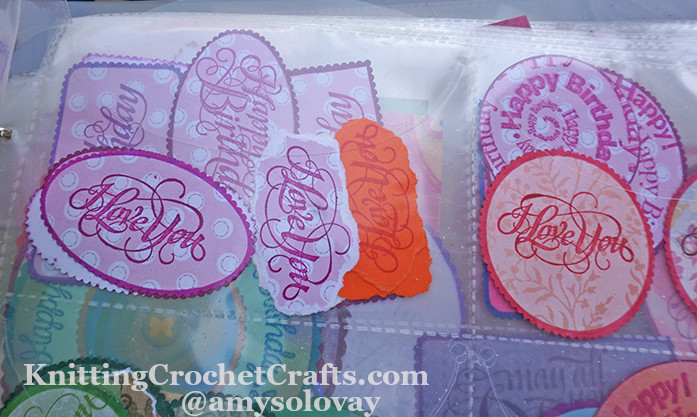
#3: Don’t start scrapbooking your next layout until after you have created a fantastic variety of lovely stamped embellishments you can draw from.
That’s it! It’s really that simple.
But let’s break it down and take a closer look at how this works, and more importantly, why it works.
Think about how things are made in a factory. They are usually made assembly-line style, with one worker doing each task separately.
You aren’t a factory, and your scrapbooking layout is a one-of-a-kind item. But if you can separate out your tasks, assembly-line style, you will increase your own efficiency at making projects.
If you’re one of the crafters who isn’t actively using your stamps, your process probably goes something like this:
- You grab photos to scrap.
- You look through your stash and find supplies that will enhance your photos: perhaps themed papers, cardstock in colors that match the colors in your photos, embellishments that will look good with your photos – possibly pocket page protectors in configurations that will fit your photos.
- You arrange and re-arrange elements until you're satisfied with the placement, then adhere the items to the page.
- You place the finished layout in an album to display.
At no point in this process does it ever even occur to you to grab stamps and stamp something with them to use in your layouts.
Or even if it does occur to you to grab stamps, stopping what you’re doing at that point to start stamping would be a royal hassle, so you don't do it.
When you’re making layouts, you will waste a lot of time if you have to stop the flow of creating to get out your inks, rummage through your stamps, stamp the images you need, change your mind, stamp different images, then clean everything up, and then maybe never even get back to finishing your layouts.
Essentially, stamping at that point would require stopping one workflow and starting on a different, completely separate workflow.
That doesn’t work out well, usually – and that is the main reason why you are probably not using your stamps as much as you might like.
Stamping requires a different sort of workflow and creative process than scrapbooking does. This is because, at its heart, stamping is an entirely different activity than scrapbooking is.
Therefore, you have the best chances for success if you acknowledge this reality by giving each of these activities its own workflow and its own allotted time in your crafting schedule.
Here’s how to make it easy on yourself: If you make stamped images ahead of time, and organize them with your other craft supplies, those finished, stamped images will become part of your usual workflow for making layouts.
Most Important Takeaway: At whichever point it is that you start grabbing supplies to use in your scrapbooking, your stamped images need to already be there for you to grab along with your store bought enamel dots, die cuts, stickers, washi tapes and whatever else you use.
Does that make sense?
So your key to success will be this:
- Stop trying to lump these two activities into one.
- Make a conscious effort to split your crafting time by activity.
How you split your activities will vary slightly depending what you like to do. For me, I stamp, but I don’t spend a lot of time coloring my stamped images. So your schedule might look different if you stamp and color than it would if you stamp but don’t color.
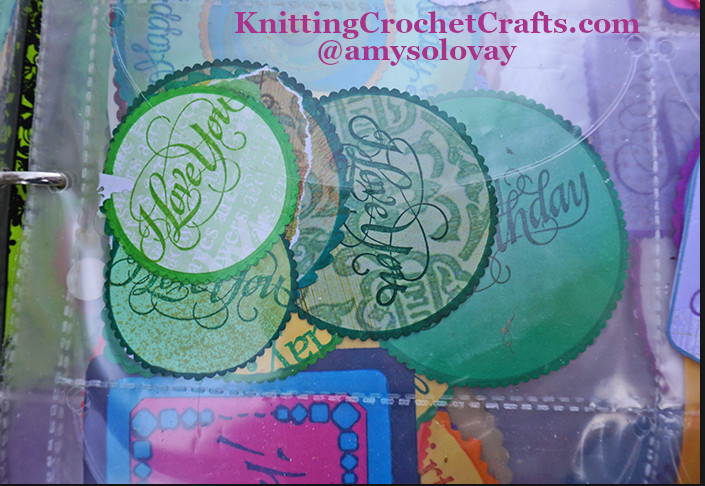
I do complete start-to-finish sessions where I don’t do anything except stamping, cutting out the stamped images, and then organizing the stamped images into my stash.
If you just stamp, that’s how I suggest doing it.
If you stamp and color, maybe you’d want to split those activities up into two separate sessions. Do one stamping session; then in the next session, you’d focus on coloring your stamped images, cutting them out and organizing them so they’re ready to use.
Do your best to arrange your crafting time so you’re only ever focused on one thing at a time, you don’t have to stop what you’re doing to do something else, and you only have to get out, clean up and put away one set of supplies at a time.
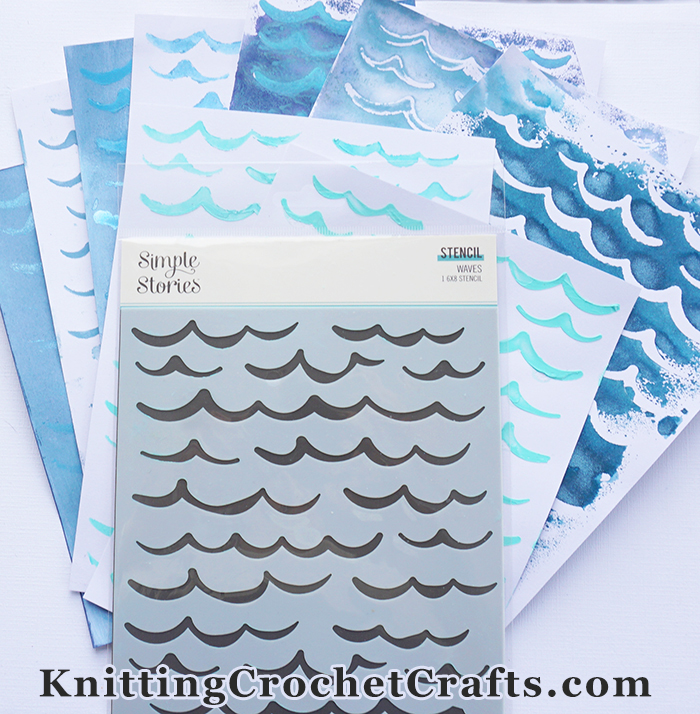
If you have stencils, you can also do complete start-to-finish sessions where you do nothing except stenciling. With stenciled images, I find that my cycle for doing them usually takes about a week:
- Day 1, stencil. Clean up. Let the stenciled papers dry overnight.
- Days 2 -6, flatten the stenciled papers between the pages of books.
- Day 7: Retrieve those stenciled images. Cut them out if that’s needed. Organize the cut out / finished images in with your stash.
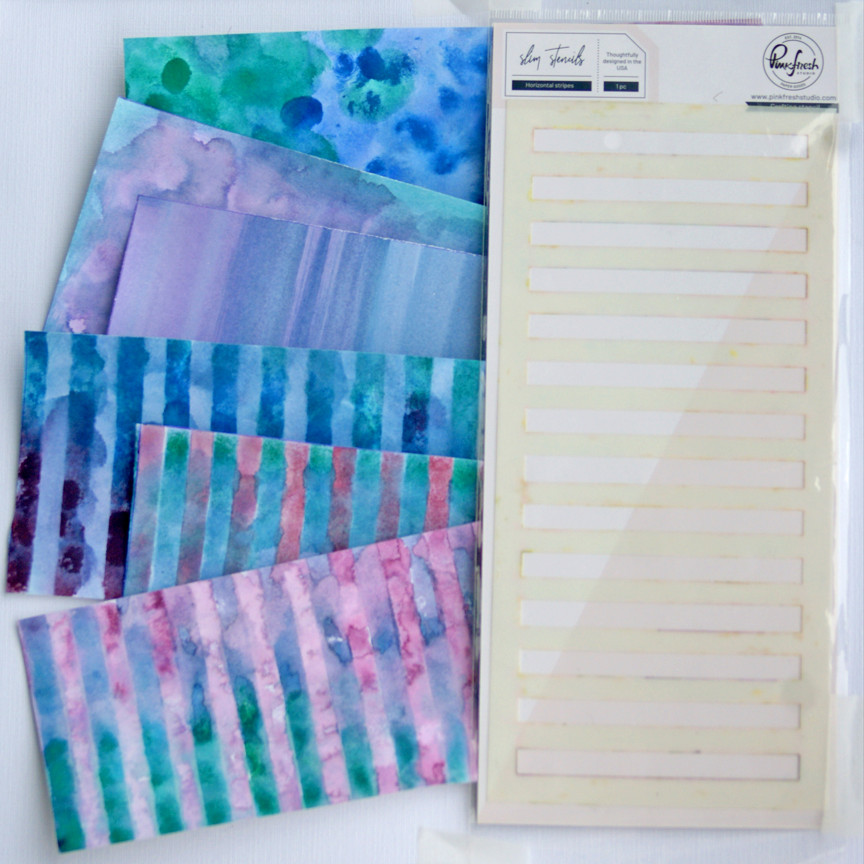
If you use sprays, or you enjoy ink blending, you might also want to do complete start-to-finish sessions where you do nothing but those activities. Or you could combine them with stenciling, if you find that works for you; I find that these processes have a similar enough workflow that they can be done together, as you can see in the photo above. I made all the above papers in one session.
Then when you actually want to sit down to create layouts, you’ll have a stash of stamped and / or stenciled images and / or prepared papers that are already ready to be used. Treat your handmade embellishments as you would any other embellishments: grab them out of your stash and use them as needed.
Pro Tip: Only ever buy stamps (or stencils) that you could envision using multiple times in your projects. If you only use your stamps once each, maybe it's time to think about whether you'd be better off buying stickers or other single-use embellishments instead of stamps. Stamps are only worth buying if you actually use them multiple times in your projects. For single-use images, stickers are a lot cheaper and easier than stamps.
Most Important Takeaway #2: You only really get your money’s worth out of your stamps with repeated use over the long term.
Nowadays, I have a self-imposed rule that I’m only ever going to buy stamps I could see using at least a dozen times in my projects. That works for me. You might want to set your limits differently, but I encourage you to at least give your limits some thought. This will prevent you from wasting money impulse-buying stamps.
Pro Tip #2: Figure out how to make stamping a habitual part of your routine. I try to stamp for about 15 minutes every day. You don’t have to do it daily – but you do have to do it sometimes, or you’ll never use your stamps.
Even if you don’t stamp daily, try to schedule at least a little time in your week each week for stamping. Stamping doesn’t require much brainpower or energy, so you can fit it in at times when you don’t feel like doing anything else. You can watch movies and stamp. Or you can drink your morning coffee and stamp. I don’t drink coffee in the morning, but I do tend to stamp every day right after waking up. It doesn’t matter if I’m still a little groggy; I use stamping as a “warmup” for the rest of my day. I skip stamping if I decide to sleep in or I have too much “real-world” work to do, but most days I start off with 15-30 minutes of stamping and organizing.
Here’s one possible idea to keep you on track with stamping. Before you go to bed, pick one stamp, one stamping block (or your positioner) and one ink pad you want to use. Either grab a handful of white cardstock or a bunch of other papers that will complement the stamp and ink you’ve chosen. Leave all these supplies at the table where you sit down to eat breakfast. Then they’ll be there waiting for you, all ready to use.
Or when you finish your next crafting session, clean up your work space as you usually would – but then set your chosen stamp, stamping block / positioner, ink pad and papers right in the center of your work space as a tangible reminder that you are going to use them next time you craft.
Pro Tip #3: You waste a lot less ink, time and money if you stamp each image multiple times in one session using the same ink color. I try to stamp a single design at least 10 -15 times using the same ink color before I clean the stamp off, put it away and organize the resulting stamped images.
However, if you decide to do it this way, definitely consider using different paper colors. If you’re into coloring, you might prefer to stamp the image multiple times onto white cardstock so you can color it the way you want it later. Otherwise, you can stamp the image multiple times onto colored cardstock or light-colored patterned paper so you have some images that don’t need to be colored in; depending on the image, you might be able to just grab them and use them – or perhaps you’d only need to do a minimal amount of shading or coloring before using them.
Some of my favorite projects have resulted just from experimenting with stamping onto light-colored patterned paper, so please do consider that as a possibility.
Some of my other favorites have resulted from stamping images on top of other stamped images. So that’s another thing you might have fun playing around with (although I have also wasted a lot of paper and ink doing that, so that isn’t a great idea if you don’t have a high tolerance for waste and mistakes. )
Pro Tip #4: It is almost always easier to color a stamped image BEFORE you cut it out, so take that into account when you map out your workflow.
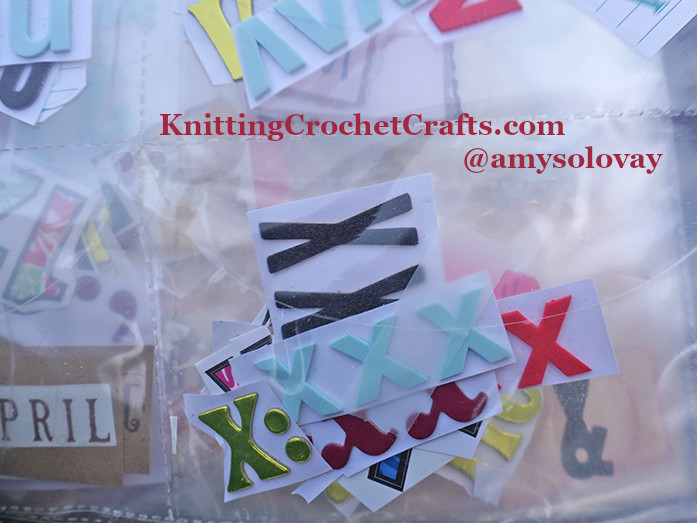
Here you can see my stash of leftover, stored Letter X Thickers Stickers. Will I ever use them? Hahahahaha!!!! Maybe someday? Honestly -- no, probably not.
Pro Tip #5: Obviously, the above advice should be modified to suit your actual needs. You don’t need the same page title stamped 10-15 times. When it comes to letters like x, z and q, you’ll probably want to stamp those as needed rather than making multiples you won’t ever use. One of the main advantages of stamping is that you can stamp exactly what you know you'll use -- unlike when you buy packaged scrapbooking embellishments, you're stuck buying things you won't ever use, like all those leftover Xes pictured above that I have stored in my organizer.
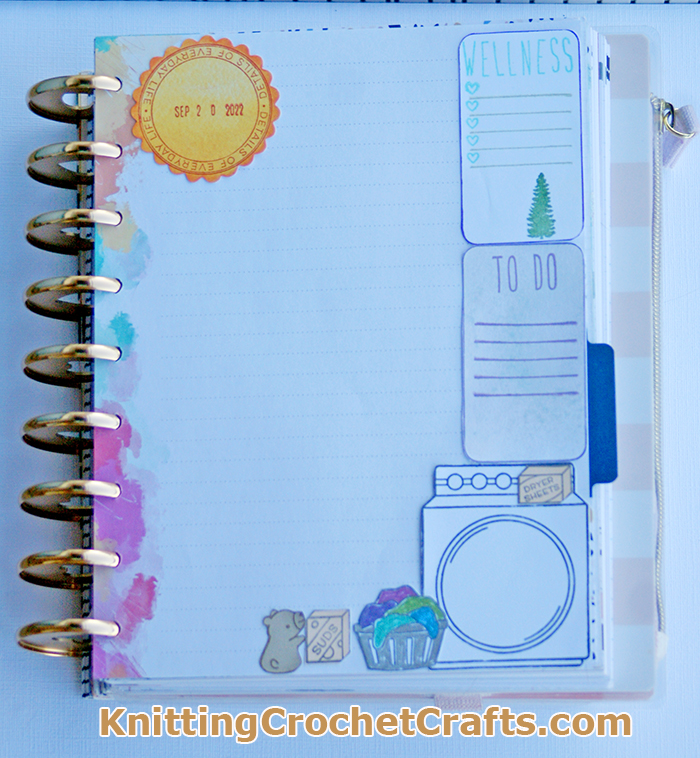
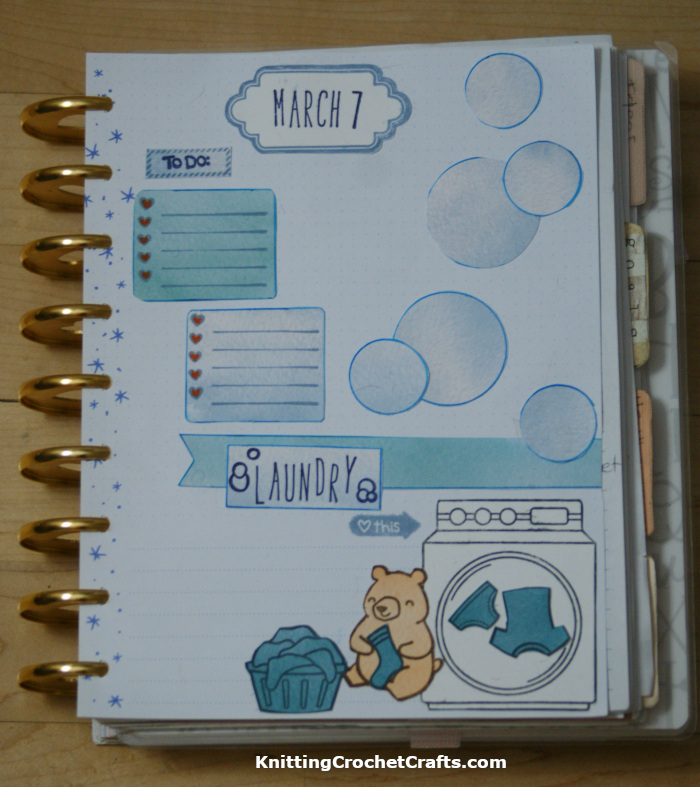
I do tend to stamp multiple vowels and other frequently used letters like s, t, n, g, and y in one sitting. If you find that you use the same words repeatedly on your pages – like your child’s name, the name of your city, the word “love”, or the name of the trail you hike most often -- you might want to go ahead and stamp multiples of those words. I stamp phrases like “laundry”, “to-do”, “wellness”, “today’s blog post”, and “today’s hike” repeatedly (because I use these words in my planner most days). If you date your layouts, it’s definitely efficient to stamp multiples of the current month and year or whichever month and year you’re currently working on scrapping.
Pro Tip #6: It’s ideal if you can give some thought to how you want to cut out your letters and words before you actually stamp them. There are many possible ways to do it, and your spacing is going to be different for each possibility. When you stamp, you need to allow enough space for cutting out the stamped image.
Pro Tip #7: It’s awesome if you can buy the corresponding dies for each alphabet stamp set, but you don’t need to. Another possibility is to cut out your letters using a shape that’s just slightly larger than the letter you’re cutting out.
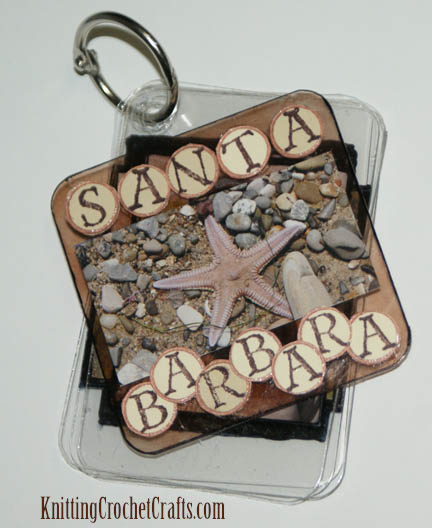
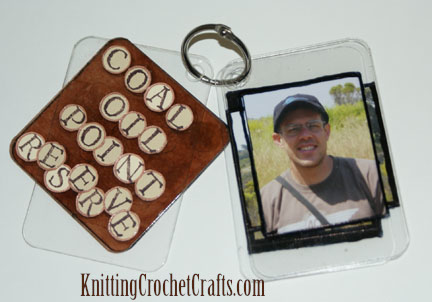
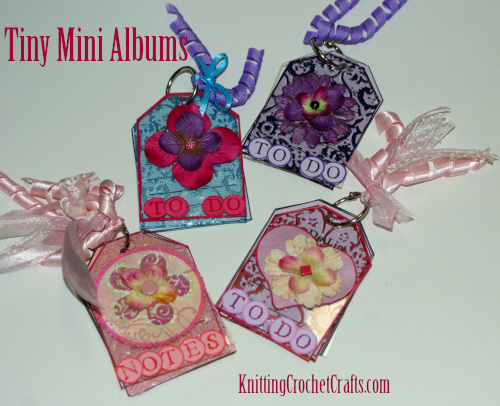
Full disclosure: I was a member of the Clear Scraps design team more than a decade ago, and several of these projects were the design team projects I submitted to them. I believe the FTC therefore could potentially consider this post (or at least part of it) as advertising, and so I wanted to disclose that relationship, even though my commitment to them has long since ended. That aside, what I'm trying to show you here isn't actually the album, but rather the stamped album title with its fussy-cut circled letters.
Here are several other examples: (these tiny mini albums were also provided to me by Clear Scraps:)
I like using squares and circles for this, but there are many other possibilities.
Furthermore, you don’t need a die cutter to do this. Most of the time, I draw around my letters with a small square or circle stencil and then fussy cut them out using decorative scissors or ordinary scissors.
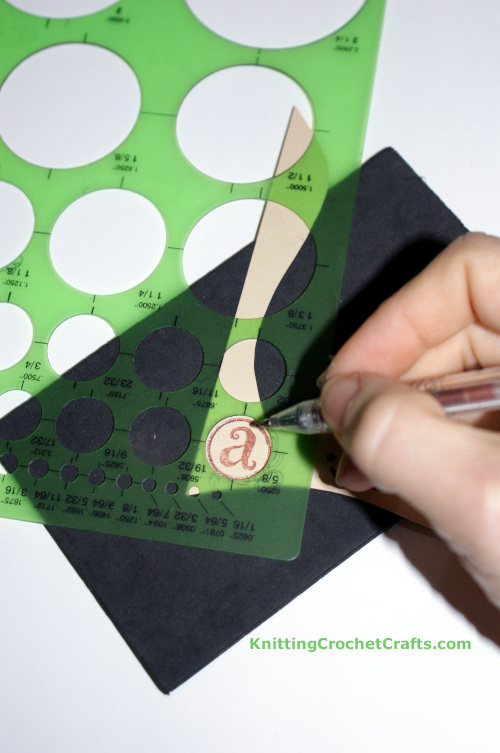
Or, sometimes, I stamp words directly onto a journaling block and then fussy cut that out using whichever scissors give the effect I’m looking for. If you scroll back up and look at the planner images I posted, you can see a couple examples of that.
So there you have it: That’s how to get your money’s worth from any stamp set.
Do you think this system could help you to start using your stamps more?
If you try any of this, please let me know how it works for you. Or if it doesn’t work for you, let’s talk about where you’re getting hung up?
Or if you have other ideas on this topic, please share them. I am totally interested in learning better ways of doing things – and I'm pretty sure everyone else here is, too. We have some other power stampers among us, and I am sure they will have valuable insights to add. The floor is open for comments, and you are all invited to share insights and post your experiences. Thanks in advance for any insights you’d care to add.
One more thing: I wrote the card maker’s version of this article somewhere around a decade ago. I've updated it a few times since then, and it is due for another update, but even in it's current form, I think it is helpful. You can check that out here, if you are interested: Stamping Sentiments for Greeting Cards and Other Paper Craft Projects


 You remind me that mine could use a good purging, too.