|
|
Post by warrior1991 on Sept 21, 2018 17:39:35 GMT
Has anyone tried a turnabout stamp in the Tim Holtz Travel stamp platform?
How did it work?
Do you use the turnabout stamp as much as you thought you would?
Thanks.
|
|
scrapnnana
Drama Llama
 
Posts: 6,451 
|
Post by scrapnnana on Sept 21, 2018 21:55:17 GMT
I have read that it works in the MISTI, so it should work in the TH platform, too, but I do not yet have any of their stamp sets.
The one I want is currently out of stock.
|
|
|
|
Post by joblackford on Sept 21, 2018 22:45:40 GMT
I've watched Justine Hovey using hers in a misti - it just has to be big enough to accommodate the 6x6 template. So I think it should work in both sizes of the TH platforms - the internet says the small one is 6.5" each side.
I haven't bought any yet. I had that same thought - how often would I use this? Especially since it doesn't seem so easy to mass produce with it -- if I've logicked it right you'd need to create a bunch of templates so you could temporarily attach each card to a template and switch them out, or figure out how to reattach the card in exactly the same place after stamping each round (does that make sense? trying to avoid having to clean the stamp after every color for each card). Anyway, that isn't terrible, but not as easy as just using a background stamp or patterned paper.
I keep seeing really cool examples though... I could spend a lot of money in that C&9th store!
|
|
|
|
Post by warrior1991 on Sept 22, 2018 0:59:16 GMT
joblackford I didn't think of that. I LOVE polka dot paper and was thinking how great it would be to make my own. But I do usually make more than 1 card when I create. Not dozens; but 3 or 4. I have seen their tutorial videos, but I forgot about the template. hmmm . . . .
|
|
|
|
Post by joblackford on Sept 22, 2018 5:08:06 GMT
joblackford I didn't think of that. I LOVE polka dot paper and was thinking how great it would be to make my own. But I do usually make more than 1 card when I create. Not dozens; but 3 or 4. I have seen their tutorial videos, but I forgot about the template. hmmm . . . . I think 3 or 4 wouldn't be too bad. I guess the templates don't really have to be fancy or laminated, so it wouldn't be too bad to make 4 of them. And if you stamped in one color it wouldn't be much of an issue either - you could just stamp each card completely and then start over. But if you did the 4 separate colors it would be nice to do all 4 of the yellow ones, then all of the blue, then all of the red... knowing that you really need to clean well between colors. Usually when I use my stamp platform I'm making multiples of something, but maybe I'm overthinking it. The stamps are pretty cool. It probably wouldn't hurt to buy one and see if it's worth the trouble. |
|
|
|
Post by gale w on Sept 22, 2018 15:09:19 GMT
Where's my post...
Anyway, as long as the cardstock is the same size as the template you should be able to mass produce. Just set it up with the template in the corner, position the stamp, then replace the template with cardstock, which should always go back into the corner.
|
|
GiantsFan
Prolific Pea
  
Posts: 8,508
Site Supporter
Jun 27, 2014 14:44:56 GMT
|
Post by GiantsFan on Sept 22, 2018 15:38:40 GMT
I only have the Tim, and I have and use C&9th turn-a-bout stamps. I use the Bitty Burst stamp the most.
ETA : Sorry I just realized you mentioned Timmy (Travel version). I have not used it in that one. I will check later and report back.
|
|
GiantsFan
Prolific Pea
  
Posts: 8,508
Site Supporter
Jun 27, 2014 14:44:56 GMT
|
Post by GiantsFan on Sept 22, 2018 21:42:42 GMT
Ok, I checked it out and I only have the smaller turn-a-bout stamps, Bitty Burst and Wreath Turn-a-bout, which do work in Timmy (travel tim). Sorry, not sure about the others. But I bet they fit, because you can use a full sized card in the Travel Tim.
|
|
|
|
Post by anniefb on Sept 23, 2018 17:37:20 GMT
I have a few turnabouts and use them a lot in my regular sized TH platform. If the travel sized Tim has at last a 6x6 stamping area, they will work.
I think it's pretty easy to multi task with the stamps - I usually put the template in the corner so it's easy to line up again and then just take out one piece of card and put another in its place, securing with temp adhesive or a magnet, then always turn in the same direction. Jennifer McGuire has a few videos with some tips.
|
|
|
|
Post by joblackford on Sept 24, 2018 5:09:26 GMT
I guess all the examples I had seen used an A2 card sized piece temporarily affixed in the center of the template, rather than a 6x6 piece. Using a 6x6 piece and/or positioning the card front in the corner rather than in the middle would definitely make things much easier.
|
|
|
|
Post by cbet on Sept 24, 2018 13:25:52 GMT
I know most of the examples show an A2 card, but to be honest in order for the turnabout stamps to work, the A2 card needs to be dead center on the template. (This might not be true with some of the newer ones, but the first one with the triangles is particularly fussy. The one with the sprinkles, less so.) I created a laminated template showing where to align the A2 card, but the clear stamps stick to the template and pull everything back up. It's much easier to just start with a 6x6 piece of cardstock and then trim it down afterward.
|
|
|
|
Post by anniefb on Sept 24, 2018 18:19:26 GMT
I know most of the examples show an A2 card, but to be honest in order for the turnabout stamps to work, the A2 card needs to be dead center on the template. (This might not be true with some of the newer ones, but the first one with the triangles is particularly fussy. The one with the sprinkles, less so.) I created a laminated template showing where to align the A2 card, but the clear stamps stick to the template and pull everything back up. It's much easier to just start with a 6x6 piece of cardstock and then trim it down afterward. This is what I do as well now because I had a couple of instances of the stamps not lining up well on a smaller A2 piece of card. |
|
|
|
Post by warrior1991 on Sept 24, 2018 18:50:21 GMT
So if I start with a 6x6 piece of cardstock, then I don't have to mark the middle of the cardstock piece or the stamp?
|
|
|
|
Post by gale w on Sept 24, 2018 19:03:37 GMT
So if I start with a 6x6 piece of cardstock, then I don't have to mark the middle of the cardstock piece or the stamp? You would still mark the center of the stamp. Then you use the template to position it in the positioner before stamping your cardstock. You use the template to mark the center of the stamp but you only have to do that once. |
|
|
|
Post by riley on Sept 26, 2018 15:55:43 GMT
Concord and 9th is having a 30 hour 25% off sale on everything in case you want to buy a turnabout.
|
|
|
|
Post by warrior1991 on Sept 26, 2018 18:01:02 GMT
riley I got the email from them and so I did order the polka dot turnabout. Thanks for letting me know!! 
|
|
|
|
Post by anniefb on Sept 26, 2018 19:19:18 GMT
I put some things in my cart then quickly backed out of the site. Have spent my craft budget for this month and am trying to stay strong!
|
|
|
|
Post by gale w on Sept 26, 2018 19:45:36 GMT
Concord and 9th is having a 30 hour 25% off sale on everything in case you want to buy a turnabout. Thanks...I think. I had a few turnabout stamps on my wish list.  |
|
scrappington
Pearl Clutcher
 in Canada
Posts: 3,139 
|
Post by scrappington on Sept 28, 2018 17:52:30 GMT
I'm going to go the 6*6 paper route instead of fiddling with the A2 size. Cutting down is much easier.
I'm going to try it in my TH press too vs my stampaholic.
|
|
|
|
Post by warrior1991 on Sept 28, 2018 19:30:41 GMT
My turnabout stamp should arrive on Monday. scrappington Let us know how it works. |
|
|
|
Post by warrior1991 on Oct 20, 2018 21:38:34 GMT
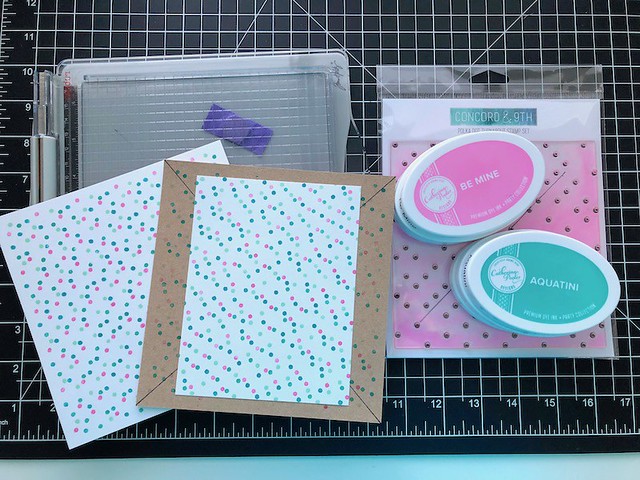
Okay, finally had time to play with the polka dot turnabout stamp. I watched a few videos first, then drove in. I marked the middle of the stamp just like they say to. I marked the middle of a 6x6 piece of cardstock (jig) like they said. I temporarily glued down my white cardstock I was going to stamp on, and it didn't work. Well, it worked and it looks cool, but it is not perfectly straight lines like they show on the back of the stamp set package. I tried it again turning the 1/4 turn the other way, which they said in the videos that the direction doesn't matter as long as you go the same way each 1/4 turn. I should have used 4 colors to show the 4 stamping, but I didn't think of it. I used all the same color ink, but I did stamp it 4 times. I only have the mini MISTI and the Tim Holtz travel platform. I used Tim's travel platform and i don't see why it wouldn't work, but it didn't work. So do I really need the full size MISTI?  |
|
Deleted
Posts: 0
Nov 25, 2024 3:41:45 GMT
|
Post by Deleted on Oct 21, 2018 0:37:46 GMT
Well, warrior1991 , whatever you're doing wrong, I'm doing it, too. LOL I bought this turnabout during the recent sale, but hadn't used it yet. I pulled it out to try it in my Tiny Timmy after seeing your post. I got the exact same results as you despite following the directions on the package to the letter. I have several of their turnabout stamps, but I've never had any issues with any of the others. I tried it on both a piece of 6x6" card stock as well as an A2 size adhered to a jig using repositionable tape runner. I actually don't mind the pattern. I think it's actually a bit cuter than having them all lined up in perfect rows. That being said, one kind of expects to get what they paid for though.  |
|
|
|
Post by joblackford on Oct 21, 2018 0:54:32 GMT
warrior1991 and CoffeeCrafter they both look really cool and I wouldn't have known there was a problem if you hadn't pointed it out. But now that I google it I see what you're saying... it's more of a random dot rather than a pegboard pattern. I have no idea what could be causing the issue though. I tried to google it but didn't come up with anything useful so far. I'm sure you can make it work in the Tiny Timmy - I can't think why it wouldn't. I found this video where the person says (around 2:00) that hers wasn't stamping in the proper grid, even though she'd made another that was right - but she didn't explain what went wrong with this one. I wonder if she would answer a comment on her video to explain what the problem was...? Justine Hovey videos also show how to set up turnabout stamps, so maybe she might have some tips/answers.
|
|
Deleted
Posts: 0
Nov 25, 2024 3:41:45 GMT
|
Post by Deleted on Oct 21, 2018 1:01:15 GMT
Thanks for the video link, joblackford. I'll check it. This is the only turnabout stamp I've ever had not work as intended, so I'm not sure what the issue is. I've downloaded the larger alignment guide PDF from their website to ensure I have my center markings on the stamp correct. I just used the small diagram on the back of the stamp set, so perhaps my lines are a bit off or something. The one on the website shows the marking on the entire stamp. I just need to get my printer set up (I moved recently) so I can print out the larger version and give that a try. |
|
|
|
Post by warrior1991 on Oct 21, 2018 1:03:53 GMT
CoffeeCrafter, I printed the alignment guide from their website and it matched exactly, just like the little one on the back of the stamp package. This is the only turnabout stamp I have, so I have no frame of reference. Let me know what you find when you print out the alignment.
|
|
Deleted
Posts: 0
Nov 25, 2024 3:41:45 GMT
|
Post by Deleted on Oct 21, 2018 1:19:39 GMT
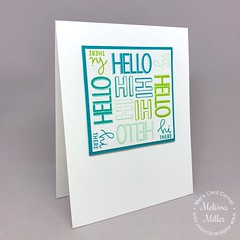
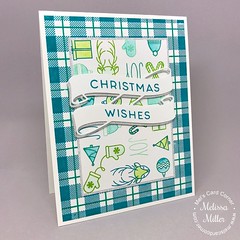
I definitely will, warrior1991 . This one really has me perplexed. Here are a couple of other cards I've made in the past using turnabout stamps and they worked perfectly. I didn't do anything differently this time than I've done in the past, so I'm not even sure how to troubleshoot what I've done wrong. LOL   |
|
|
|
Post by anniefb on Oct 21, 2018 9:25:04 GMT
Hmm very odd warrior1991 and CoffeeCrafter see what you mean and wonder why it isn’t lining up as it should. If you work it out let us know. |
|
djc
Shy Member

Posts: 16 
|
Post by djc on Oct 21, 2018 17:30:38 GMT
I just watched the video that joblackford linked. I was hoping that, by now, someone would have figured out and commented on the misalignment question. That didn't happen. I actually like the more random look, but it would be nice to be able to control when it's going to show up.
As I watched the video, I noticed that the cardstock was not perfectly straight, and when I found Hannah's blog, she mentioned that as the cause of the misalignment:
You wouldn't think that a slight angle change would make such a radical difference. I just bought this stamp, and now I am looking forward to playing with the angle of the cardstock to see what happens.
Thank you for all the input.
Daria
|
|
scrapnnana
Drama Llama
 
Posts: 6,451 
|
Post by scrapnnana on Oct 21, 2018 17:31:48 GMT
I finally bought the Concord & 9th turnabout wreath through Amazon. I only have the TH platform. It worked fine, but I have no other turnabout stamps to compare it to.
|
|
|
|
Post by warrior1991 on Oct 23, 2018 19:47:52 GMT
I got to thinking about what the next step for this is. I like the look that I get now from the polka dot turn about, but am still curious why it isn't working the way they show on the back of the packaging. But do I want to contact Concord & 9th? I'm not sure. Also, if the answer is that I have to use the full size MISTI to make it work the way the packaging shows, then my curiosity will end there. I have the Mini MISTI and Tim's travel platform and that is all I need. I will not buy the full size MISTI for the sole purpose of using the polka dot turnabout. boy that sounded harsh. It wasn't meant to, just a matter of fact statement.  CoffeeCrafter CoffeeCrafter What do you plan to do next? If anything? |
|