naby64
Drama Llama
 
Posts: 6,428  Member is Online
|
Post by naby64 on Jul 29, 2014 16:57:09 GMT
I love those little banners. Does anyone else have a hard time making the nesting banners like that? Am I the only one that frets about them matching up? I'm not sure what you mean by "matching up?" Do you mean the < in the end of the pennant piece? YES!! I was doing one over the weekend and the sides I had no problem with. It is matching the fishtail part up. It is probably just me and wouldn't bother anyone else. |
|
|
|
Post by scrapperlady on Jul 29, 2014 17:29:09 GMT
By "matching them up," I am assuming you mean getting the < to be the same on each piece. If so; just cut one that you like, line up the other piece(s) of paper to match (ends level) and use the first cut as your guideline for cutting the others. I hope this helps. If not; let me know and I will try again.
|
|
|
|
Post by anniefb on Jul 29, 2014 19:52:48 GMT
These would be fun for travel LO's:  Those are super cute! |
|
monil
Shy Member

Posts: 49
Jul 10, 2014 17:41:11 GMT
|
Post by monil on Jul 30, 2014 4:02:14 GMT
Love those washi embellishments and the little banners! I'm now following everyone's boards that have been shared. Lots of great ideas here.
|
|
lisavb
Full Member
  
Posts: 148
Jun 25, 2014 21:49:19 GMT
|
Post by lisavb on Jul 30, 2014 13:43:25 GMT
I'm not sure what you mean by "matching up?" Do you mean the < in the end of the pennant piece? YES!! I was doing one over the weekend and the sides I had no problem with. It is matching the fishtail part up. It is probably just me and wouldn't bother anyone else. I've had customers with good luck using a square punch, and just punch out the pennant piece. My favorite way is to use the Tim Holtz ruler. It has a centering ruler, so I can find the center of the pennant. Then, you can put it up as far as you want from the bottom of the piece. Put a little dot where you want the V to meet in the top and just cut it out. |
|
|
|
Post by anniefb on Jul 30, 2014 20:49:46 GMT
YES!! I was doing one over the weekend and the sides I had no problem with. It is matching the fishtail part up. It is probably just me and wouldn't bother anyone else. I've had customers with good luck using a square punch, and just punch out the pennant piece. My favorite way is to use the Tim Holtz ruler. It has a centering ruler, so I can find the center of the pennant. Then, you can put it up as far as you want from the bottom of the piece. Put a little dot where you want the V to meet in the top and just cut it out. Thanks for the tip about the centering rule. I think I have one of those somewhere  |
|
Deleted
Posts: 0
Nov 24, 2024 16:44:48 GMT
|
Post by Deleted on Jul 30, 2014 22:07:42 GMT
Nylene's board is my Favorite Pinterest board. If you haven't seen it, check it out! I also follow Nylene's board.  I'd put a link to mine, but I got most of them from Nylene. |
|
AerynK
Full Member
  
Posts: 262
Location: CA
Jul 7, 2014 19:51:37 GMT
|
Post by AerynK on Jul 30, 2014 23:13:24 GMT
great suggestions and inspiration here.
I always have the best of intentions when it comes to embellishments, especially since I can never justify buying anything other than wood veneer and *very* cheap enamel dots. I used most of my year long Silhouette sub to buy shapes to make my own flowers and small embellishments, plus there's punches, and the Cameo can cut any clip art in an size that I need. Yet what do I use on my pages? ONLY? Wood veneer and enamel dots.
The one thing I *did* do was go through and punch out shapes from the scraps of AT Sketchbook that I was using for my 2013 PL. I have a little box of them, along with my Perler bead dots, that I can pull from when I work on that project (no, not done yet!), but that's as far as I've gotten.
|
|
camcas
Pearl Clutcher

Posts: 4,156 
|
Post by camcas on Jul 31, 2014 1:37:49 GMT
I was just gonna post and say that isbaha has some awesome stuff on her blog-but she has already posted that here!
|
|
|
|
Post by mandolyn9909 on Jul 31, 2014 15:29:50 GMT
I have made my own paper feathers. Here is the tutorial I used. paper feathers |
|
|
|
Post by irisheyes on Jul 31, 2014 22:19:11 GMT
|
|
doglover
Full Member
  
Posts: 237
Jun 27, 2014 14:50:33 GMT
|
Post by doglover on Aug 3, 2014 20:48:02 GMT
I've been doing a couple of things lately that I've been really enjoying:
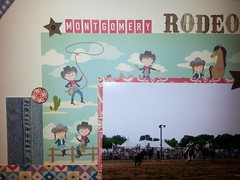
Technique [HASH]1: I've bought some empty (metal part only) decorative brads. I fill then with either patterned paper I've cut, or something I've printed on my computer. I love this because it is so quick and easy to do. Takes less time than trying to find a pre-made one that matches and has the right theme.
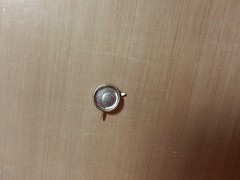 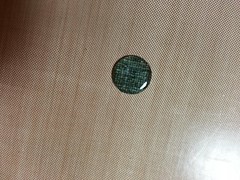 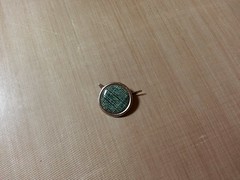
These are two examples that I punched from patterned paper and then coated with Glossy Accents.
On the first layout I also made other embellishments. I made the white/green tag on my computer and then fussy cut it. The tan scalloped circle and star were punched, and then I added enamel dots.
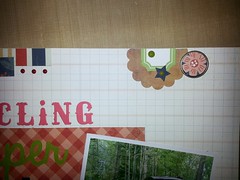 
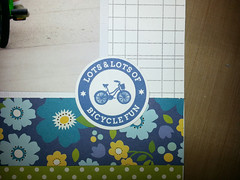
Technique [HASH]2: I bought a set of files that I can manipulate on my computer to make custom round accents. The text is fully editable, and you can add or delete graphics and change colors. I like my embellishments to match the theme of my pages, so I'm loving this.
This is the link to what I bought Graphics Fuel Badges
This is an example of one of the embellishments I made. I changed the text and added the image of the bicycle in the middle.
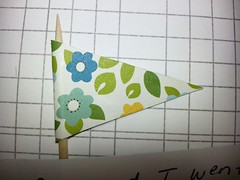
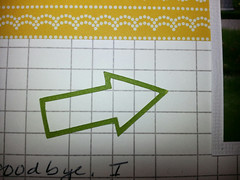
On the above layout, I also made a couple of other embellishments:
|
|
naby64
Drama Llama
 
Posts: 6,428  Member is Online
|
Post by naby64 on Aug 4, 2014 14:55:26 GMT
Doglover, I love those embellishments! Where do you find those empty brads? Genius!
|
|
|
|
Post by sbartist on Aug 4, 2014 15:45:53 GMT
Doglover, thank you for sharing your tips. Stampin Up (I think) used to sell Build-a-Brads (base with an epoxy circle) I purchased several of the kits. I need to use them more.
|
|
jenny225
Shy Member

Posts: 24 
|
Post by jenny225 on Aug 4, 2014 16:05:30 GMT
This board is everything! I need all these ideas printed out into an easy book for me.  |
|
doglover
Full Member
  
Posts: 237
Jun 27, 2014 14:50:33 GMT
|
Post by doglover on Aug 4, 2014 22:38:24 GMT
Naby64 -- I ordered them from a vendor on Alibaba.com.
|
|
Deleted
Posts: 0
Nov 24, 2024 16:44:48 GMT
|
Post by Deleted on Aug 4, 2014 23:09:05 GMT
I love all the ideas on this thread. I posted three old layouts on my blog today that show different embellishment ideas along with the complete layouts. Throwback ThursdayThat little book is TOO CUTE! |
|
Deleted
Posts: 0
Nov 24, 2024 16:44:48 GMT
|
Post by Deleted on Aug 5, 2014 4:25:27 GMT
You guys got me inspired so I tried to make some of my own using my punches, dies and paper. This is my first try: (ignore the cookie crumb in the middle of the photo, you caught me LOL)  |
|
doglover
Full Member
  
Posts: 237
Jun 27, 2014 14:50:33 GMT
|
Post by doglover on Aug 5, 2014 13:01:05 GMT
Kat -- Gorgeous!
|
|
Deleted
Posts: 0
Nov 24, 2024 16:44:48 GMT
|
Post by Deleted on Aug 5, 2014 14:40:48 GMT
thanks  |
|
naby64
Drama Llama
 
Posts: 6,428  Member is Online
|
Post by naby64 on Aug 5, 2014 14:45:05 GMT
Kat, just WOW!! I hope you don't mind but I am sooooooo scraplifting those!! Can I please ask what paper line? I know I should know it but can't place my finger on it.
|
|
scrapperdee
Junior Member
  Refupea 1827
Posts: 76 
|
Post by scrapperdee on Aug 5, 2014 15:11:16 GMT
I LOVE to create my own embellies! Is there anyone else here that does that too or would like to learn more about creating embellies? If so; I thought it would be fun to have a thread where we could post ideas or pics of what we have created. Is anyone interested? Thanks for this thread - really loving all these posts! I would love to do this too...I guess I just need a push! I'm so far behind in my scrapbooks, that I'm more about gettng them done than thinking about making embellishments...but I really LOVE all of these ideas! |
|
|
|
Post by SunnySmile on Aug 5, 2014 15:56:53 GMT
I am just getting started with making my own embellies. I save pics of things I see to my computer. Why I didn't think to make a pinterest board is beyond me. I have a board for everything else under the sun! Love the work shown and all the ideas. Thanks for the links also. So much to explore! And it doesn't hurt that it saves a bunch of money to make your own!
|
|
|
|
Post by scrapperlady on Aug 5, 2014 16:35:17 GMT
Kat - Great post! Very inspiring!!
|
|
|
|
Post by vintageblossom on Aug 5, 2014 19:17:38 GMT
That would be fun, I don't currently make any of my embellishments but I would love to learn. Also I find that I am sometimes inspired by embellishments, so this would be a double win.
|
|
Deleted
Posts: 0
Nov 24, 2024 16:44:48 GMT
|
Post by Deleted on Aug 5, 2014 22:17:57 GMT
It's Echo Park's Capture Life  |
|
naby64
Drama Llama
 
Posts: 6,428  Member is Online
|
Post by naby64 on Aug 5, 2014 23:40:30 GMT
It's Echo Park's Capture Life  YAYYY!!!! I just grabbed the paper pack at HL with my coupon on Saturday. I already had the 6x6 pad. Yippy Skippy!! |
|
|
|
Post by berta147 on Aug 6, 2014 0:18:31 GMT
This is such a great thread!! Thanks so much for all the inspiration.
I need a little free time to try all these great ideas.
|
|
|
|
Post by justcindy on Aug 6, 2014 2:33:33 GMT
thanks  Get out of TOWN those are way too cute!!!!  I love every one of them! Did you use silhouette cuts, or dies, border punches? I honestly just looked over on my scrap desk at the layout I was working on this afternoon and thought that some of those stitched border-y pieces would have been PERFECT in place of the wimpy two scrap strips I put at the top of my layout - I really may pull it up and attempt a little sewn grouping like you made. TOO CUTE! Thank you for sharing! |
|
|
|
Post by Minnesota*Mom on Aug 6, 2014 3:18:51 GMT
This might just be the motivation I need to get back in my scrap room and create something.  |
|